Or how Stephen just realised the error of his thinking for the last few years…. again.
Recently I’ve been thinking more about the perennial problem of using squid poles as antenna supports – the fact they all too readily collapse into themselves. This is probably more of an issue with permanently set up poles, but it also can waste valuable operating time in the field. Insulating tape works for a while, but it removes protective paint from the pole and is pretty messy.
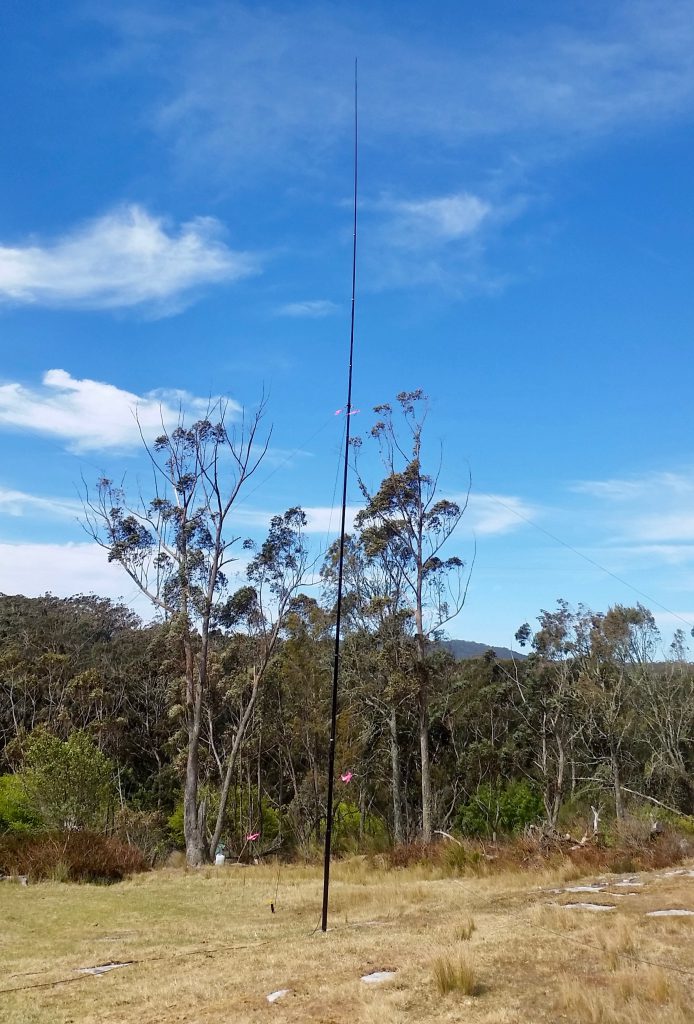
Only this past weekend I had set up my 7m squid pole near the small lighthouse at Henry Head on Botany Bay. The winds were so strong and constant I could have got away with not bothering to tether the distant end of my end fed half wave antenna, as it was blowing horizontally from the tip of the squid pole – just like the original end fed Zepp antenna would have looked behind the airship that gave it its name. But of course just as I was about to answer someone’s CQ, it collapsed!
For some years now – at home – I have used an idea that I think originated from Peter Bogner of DX-WIRE in Germany where he recommended using a cable tie nestled inside a square section rubber tube to secure the sections to each other. I have always assumed the cable tie and rubber sleeve are positioned at the overlap point between two adjacent telescoping sections of the squid, that is around the lower (and larger diameter section). This approach leads to a more resilient antenna pole which is more likely to survive windy weather, but it is by no means guaranteed to stay up indefinitely.
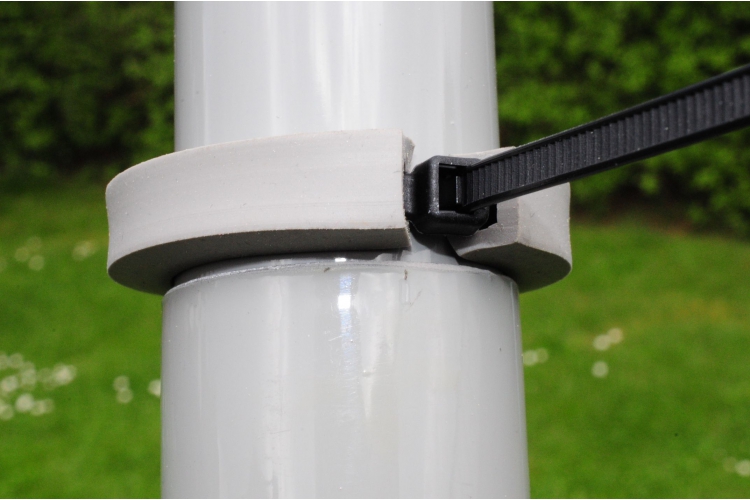
I have just checked his site, specifically the page about this “rubber profile” and realised I have been using it incorrectly. His intention was to use these as “stoppers” and as a cheaper adaptation of the rubber padded stainless steel clamps of the larger Spiderbeam poles (see below) for shorter telescopic fibreglass poles.
There is a pdf file linked to from this page which visually confirms the use of the rubber profile and cable ties as “stoppers”.
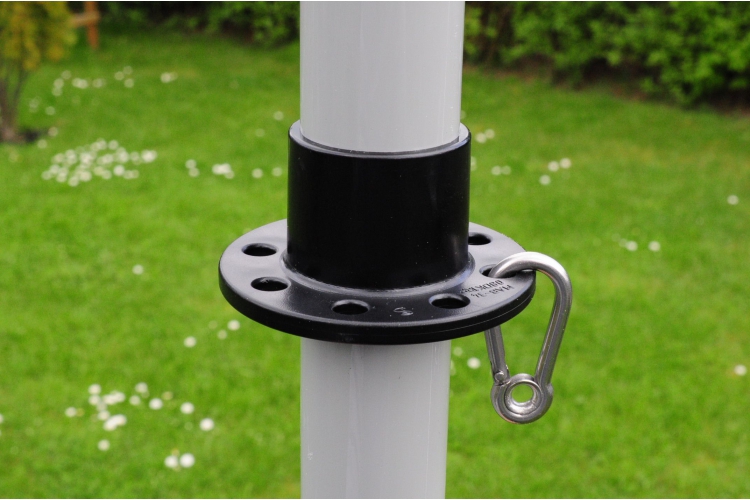
Peter Bogner’s DX-WIRE also sells a handy “support plate” that can be used on our 7m poles as a way of attaching guy lines to the pole at the handy height of about 2m from ground. It sells for 3.5 Euro including VAT.
I have been forced to think more about this topic after needing to re-assemble my collapsed 10m squid pole almost every week or two.
I happened to be looking at the Spiderbeam site and also looking at the DIY info to help build your own version of the spiderbeam antenna. I have also looked at their own more robust version of the squid pole, the Spiderbeam pole available in 12m and 18m!
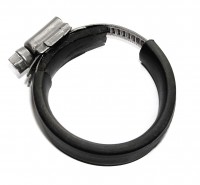
The device of choice these days appears to be the pipe clamp or what the British call the Jubilee clip. The beauty of these clips is that they can be tightened and later if necessary untightened. Seems a little more sound than using up tens of long heavy duty cable ties every time I work on the pole. The clips also make it more practical to dismantle the pole in case of particularly high winds. This would be even easier if pipe clamps with butterfly handles were used in place of the screws.
The clips are available in stainless steel and feature a worm gear driven by a screw thread to adjust the size and pressure of the clip. Spiderbeam offer a set of clips for their Spiderbeam telescopic towers, 11 for the 12m pole. They are sold along with sections of rubber to be used underneath the metal band of the clip to protect the pole.
I have read elsewhere a recommendation to insert the metal band inside a piece of heat shrink for extra protection.
For me though recently, the main question about these clips has been where precisely should they be installed on the pole.
The Spiderbeam company’s advice is clearly to install them not at the overlap but around the thinner upper section to prevent it slipping into the lower section.
Simply put one clamp at the very bottom end of each tube segment and tighten the clamp. Here it will act as a stopper and prevent the tube from sliding downwards into the next bigger tube segment. The rubber padding is made of a thick flat rubber band, protecting the mast against any damage from the clamps.
This advice is quite a surprise to me. It makes sense only if it’s assumed that the pole has been assembled in the normal (?) way of extending the sections and tightening each of them before installing the clips.
On reflection the approach of using the clips more as a stop than a clamp makes more sense. I have always had qualms about compressing the outer tube against the inner tube when they are both rather rigid. The pipe clamps are able to exert quite a deal of compression but that would be unnecessary in the recommended ‘stop’ mode.
My next task is to measure the various diameters of each and every section of my 7m and 10m squid poles from Haverford’s and my 12m Spiderbeam pole, so I can obtain the most appropriate sized pipe clamps for them. TTS Systems, the Australian distributor of Spiderbeam, sells the clamp set for A$44. You can buy direct for 15.55 Euro but postage I think is a lot more.
UPDATE: I purchased the clamp set from TTS Systems. They were easy to assemble. The kit is the set of clamps, a 1.2m length of 3mm thick by 12mm wide rubber strap and black heatshrink to hold the rubber in place.
In case you’re wondering – the pipe clamps / jubilee clips sizes for the 11 sections are:
40-60mm x 2, 32-50mm, 30-45mm x 2, 25-40mm, 23-35mm, 20-32mm, 16-27mm, 12-20mm, 10-16mm
As you can see from the photo you need to open the clamps out to install the protective rubber strip and the heatshrink. I suspect the larger, lower clamps are doing the most work.
I installed them on my Spiderbeam pole on a site in the southern highlands. It’s holding up a vertical for 40m, one of a number of antennas to be used in some upcoming contests. Returning after four weeks and strong winds, three of the lower sections had collapsed, so those clamps were tightened. I may have been too tentative/cautious on the initial installation.
The definitive website on how to install the Spiderbeam fibreglass pole clamps is http://www.dj0ip.de/spiderbeam/fiberglass-spiderpole/clamp-sets/ where Rick DJ0IP from Spiderbeam-US explains all – including the advice to use a 7mm nut driver to tighten the clamps.
Leave a Reply